05 Feb 2019
As reported in MSDN blog post, Blazor 0.8.0 was just released! It is still an experimental framework, but now the path is clear since the team made a big announce: Server-side Blazor is now ASP.NET Core Razor Components in .NET Core 3.0
As was recently announced, server-side Blazor is now shipping as ASP.NET Core Razor Components in .NET Core 3.0. We’ve integrated the Blazor component model into ASP.NET Core 3.0 and renamed it to Razor Components. Blazor 0.8.0 is now built on Razor Components and enables you to host Razor Components in the browser on WebAssembly.
So … stay tuned!
15 Jan 2019
With iPhone X, Apple release a new biometric authentication way: Face ID. Like others things, you need to obtain access to that feature. To achieve this, you must add the NSFaceIDUsageDescription key to the info.plist file:

The, optional, description will be good if you want to explain why your app request the ability to authenticate with Face ID.
After that, you will be able to use Face ID authentication:
var context = new LAContext();
if (context.CanEvaluatePolicy(LAPolicy.DeviceOwnerAuthenticationWithBiometrics, out NSError authError))
{
    var replyHandler = new LAContextReplyHandler((success, error) =>
    {
        InvokeOnMainThread(() =>
        {
            if (success)
            {
                // user authenticated
            }
            else
            {
                // user not authenticated
            }
        });
    });
    context.EvaluatePolicy(LAPolicy.DeviceOwnerAuthenticationWithBiometrics, "Authenticate", replyHandler);
}
the above code will works for both Touch ID and Face ID.
Enjoy!
13 Dec 2018
In my previous post, I’ve introduced Blazor and how you can create a new project by using Visual Studio Code on MacOS. Now we’ll see how to publish our Blazor app to GitHub Pages. This is possible since Blazor is a frontend framework and you can deploy it on any static web server host, just like GitHub Pages.
Create deployment files
As you already know, with .NET you can use the CLI (Command Line Interface) to do a lot of things, like create or build a project from Terminal. By using the same approach, we can create the deployment files with the dotnet publish -c Release command:
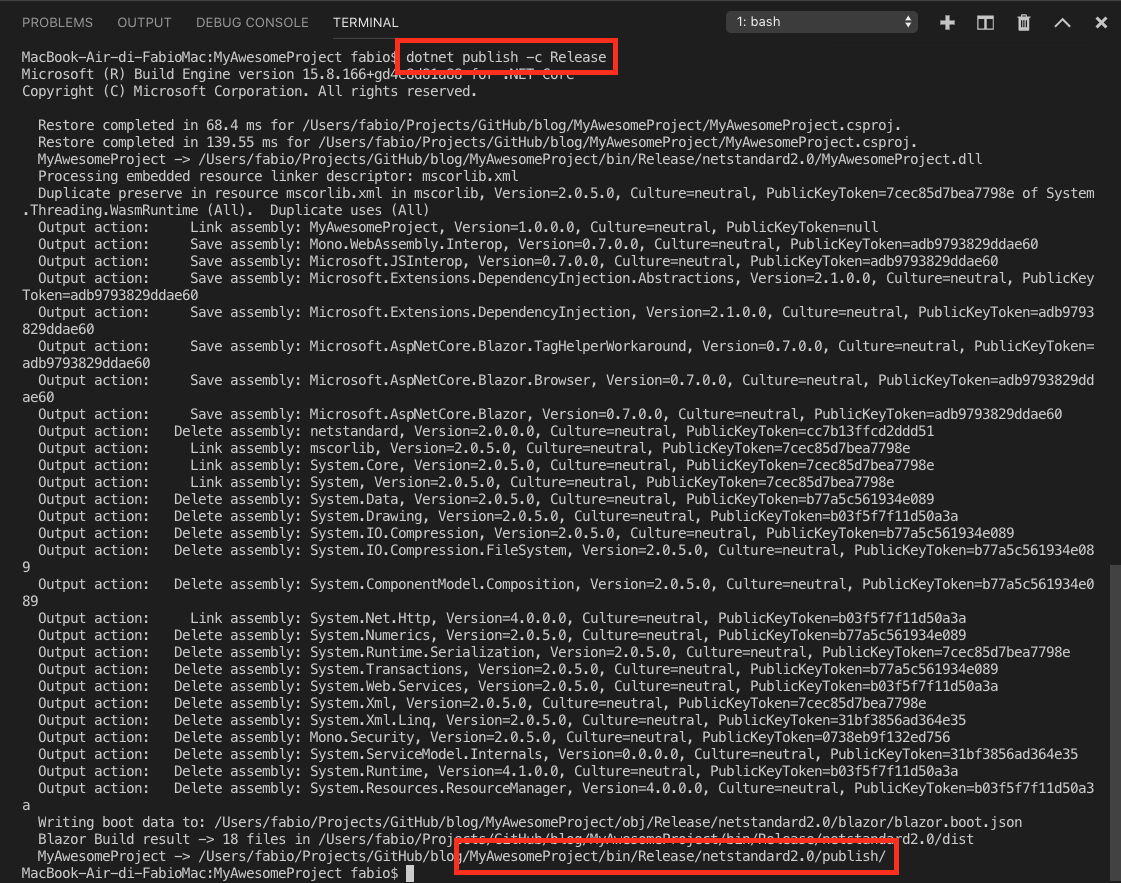
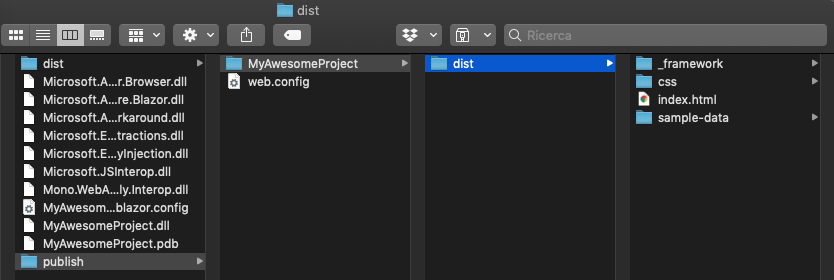
now, as you can see in the last row, you’ll find the output in the publish folder. Now go on yourprojectname folder, and then open the dist folder. Here you’ll find the deployment files.
Deploy on GitHub Pages
Now, the final steps:
You need to create your GitHub Pages repository before continue, see this page
- Clone your GitHub Pages repository https://github.com/yourusername/yourusername.github.io
- Copy the deployment files from the
dist folder to your GitHub local repository
- Add an empty
.nojekyll file to disable the default Jekyll interpreter for GitHub Pages
You can also manage 404 error or handling redirect by creating the 404.html page
That’s all, you are ready to run your GitHub Pages build with Blazor.
04 Dec 2018
Windows Communication Foundation 4.0 support Ssl3/Tls1.0 out-of-the-box. If you need to support Tls1.1 or Tls1.2, you must update to .NET Framework 4.6.
If you can’t do that, try the following workaround just before establish the secure connection:
Set the SecurityProtocol to 768 if you want to use Tls1.1
System.Net.ServicePointManager.SecurityProtocol = (System.Net.SecurityProtocolType)768;
or set to 3072 if you want to use Tls1.2
System.Net.ServicePointManager.SecurityProtocol = (System.Net.SecurityProtocolType)3072;
Note
Be sure to have .NET Framework 4.5 or above installed on the client machine!
Enjoy!
02 Dec 2018
Blazor is a new, experimental, framework for develop Single Page Application by using the same framework, library and language: C#. It is really powerful and you can use it on every OS and on every browser that supports WebAssembly.
In this post we will see how you can create a project by using MacOS and Visual Studio Code
Create a new project with CLI
The Command Line Interface is the most simple way to create a new project. To create a Blazor project, first of all you need to install the Blazor templates. On Visual Studio Code, open the terminal window by going to View -> Terminal, then write the dotnet new -i Microsoft.AspNetCore.Blazor.Templates::* command:

then, you can simply write the dotnet new blazor command:
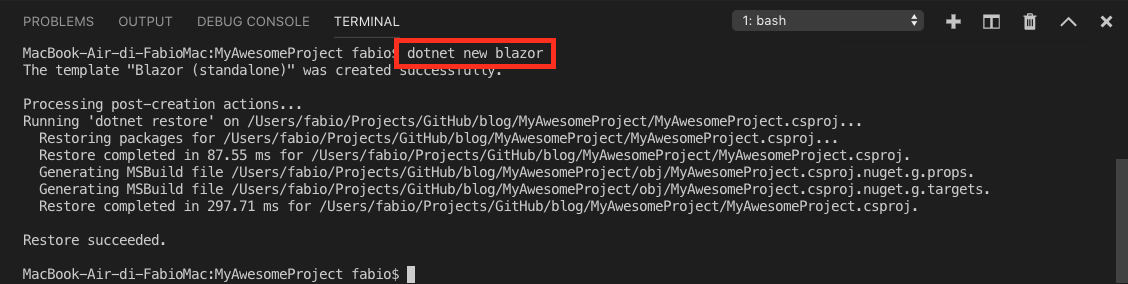
The above command download the template files and then execute dotnet restore to download all dependencies. The final project name will be the same of the container folder.
We have created the most simpler project, but you can create four different types of Blazor project:
| Command |
Description |
| dotnet new blazorhosted |
Blazor hosted in ASP.NET server |
| dotnet new blazorlib |
Blazor Library |
| dotnet new blazorserverside |
Blazor Server-side in ASP.NET Core |
| dotnet new blazor |
Blazor standalone application |
Run your project
Now, you will be able to run the project by simply execute the dotnet run command:

And if something goes wrong…
Be sure to have the latest .NET Core version installed on your development machine. Go to Microsoft Download
12 Jan 2018
Enabling the debugging of Xamarin or Mono class library in Visual Studio for Mac is really very simple and is well described in this page.
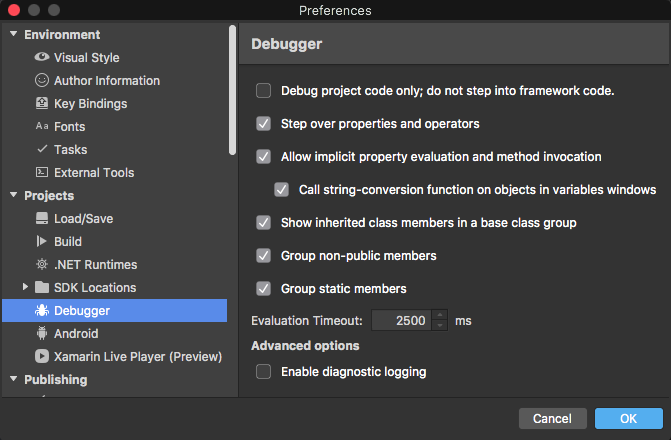
The only step you need to do is uncheck the Debug project code only; do not step into framework code. in Visual Studio for Mac > Preferences > Debugger:
But…
Even though the above page said Xamarin products ship with the source code for Mono’s class libraries, I was unable to execute the debug after uncheck the above descripted option (the step into options doesn’t work). The reason is simple: no source code is available in your machine!
So, to start debugging, you must download the Mono source code. Simply go to the Mono GitHub page, and select the tag related to your local mono version:
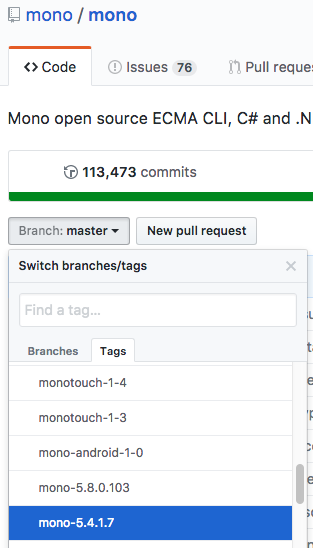
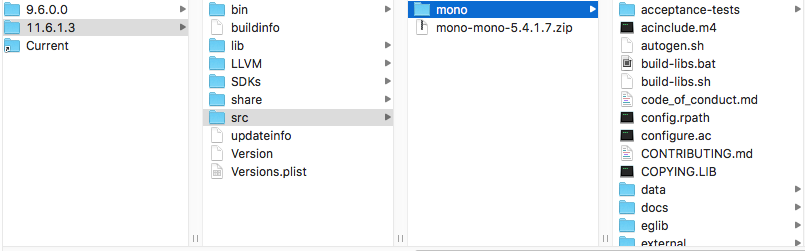
then, click on Clone or download > Download ZIP on the right side and unzip the file into the following folder:
/Library/Frameworks/Xamarin.iOS.framework/Versions/11.6.1.3/src
Finally, rename the folder in mono:
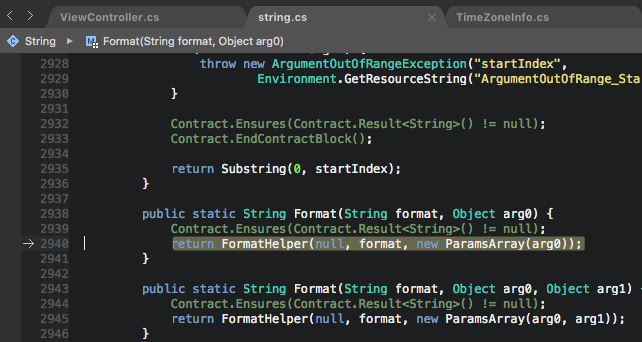
And voilà:
06 Jan 2018
Model-View-ViewModel is a widely used architectural pattern that helps you to separate UI from presentation logic responsibility. In your ViewModel you can provide data to the View through binding and handle the action by using commands, but what about the navigation? Who is responsible for showing another view?
The following schema show how the View, the ViewModel and the Model interact in the MVVM architecture:
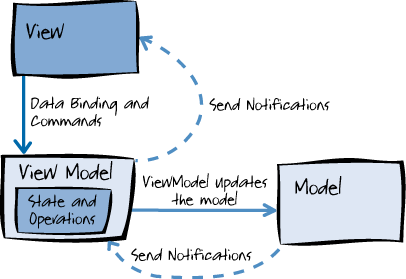
source: https://msdn.microsoft.com/en-us/library/hh848246.aspx
In this post, we’ll see how the MVVM starts the navigation in a straightforward approach, based on the assumption that navigation from ViewModel is a “request of navigation”. The “request of navigation” is sent to the View, the real executor, by using a set of specific delegates.
Show Me The Code
Since in MVVM the ViewModel doesn’t know anything about the View, we need to notify the View when a request for navigation is in place. So, to do this, our implementation provides a ViewModelBase class that, by using a delegate, inform a subscriber (the View) that navigation has been requested.
public class ViewModelBase
{
    ...
    public Func<ViewModelBase, Task> OnNavigationRequest { get; set; }

    public Task NavigateTo<TViewModel>(TViewModel targetViewModel) where TViewModel : ViewModelBase
    {
        await OnNavigationRequest?.Invoke(targetViewModel);
    }
}
On the other side, the Page will register the delegate when appearing and will cancel when disappearing:
public class PageBase<TViewModel> : ContentPage, IView<TViewModel> where TViewModel:ViewModelBase,new()
{
    ...
    public TViewModel ViewModel
    {
        get { return GetValue(BindingContextProperty) as TViewModel; }
        set { SetValue(BindingContextProperty, value); }
    }

    protected override void OnAppearing()
    {
        base.OnAppearing();
        ViewModel.OnNavigationRequest = HandleNavigationRequest;
    }

    protected override void OnDisappearing()
    {
        base.OnDisappearing();
        ViewModel.OnNavigationRequest = null;
    }
}
So, you avoid getting navigation request when the Page is not active. Last, but not least, the delegate will look similar to the following code:
public class PageBase<TViewModel> : ContentPage, IView<TViewModel> where TViewModel:ViewModelBase,new()
{
    ...
    async Task HandleNavigationRequest(ViewModelBase targetViewModel)
    {
        var targetView = ViewResolver.GetViewFor(targetViewModel);
        targetView.BindingContext = targetViewModel;
        await Navigation.PushAsync(targetView);
    }
}
The ViewResolver is responsible for maps the ViewModel to the View in a 1:1 model:
internal static class ViewResolver
{
    public static Page GetViewFor<TargetViewModel>(TargetViewModel targetViewModel) where TargetViewModel : ViewModelBase, new()
    {
        var targetViewName = targetViewModel.GetType().Name.Replace("ViewModel", "Page");
        var definedTypes = targetViewModel.GetType().GetTypeInfo().Assembly.DefinedTypes;
        var targetType = definedTypes.FirstOrDefault(t => t.Name == targetViewName);
        return Activator.CreateInstance(targetType.AsType()) as Page;
    }
}
Obviously, feel free to write it as you prefer.
Ok, let’s use it!
Now, you will be able to start navigation in ViewModel by using the following code:
public class MyViewModel : ViewModelBase
{
    ...
    public async Task DoSomething()
    {
        ...
        await NavigateTo(new OtherPageViewModel());
    }
}
Cool!
Conclusion
Let me know what do you think about this approach. You like it or you hate it? Anyway, you’ll find full code on my github repository.
04 Jan 2018
I like to write clean and small code, who don’t want? The C# team is doing a lot of works in this direction. One of the recent features that I like is the inline variable declaration with C# 7.
What do I mean? Let’s see the code. Think about a TrySomething method, something about the DateTime.TryParse, you write:
DateTime result;
if (DateTime.TryParse(input, out result))
    DoSomething(result);
else
    Console.WriteLine("Can't parse DateTime");
the new feature will enable you to write something like this:
if (DateTime.TryParse(input, out DateTime result))
    DoSomething(result);
else
    Console.WriteLine("Can't parse DateTime");
Really cool!
28 May 2017
Since a picture is worth a thousand of words, this time I preferred to made a video to show how the new Xamarin Live Player works with Visual Studio for Mac. Enjoy!
10 Apr 2017
Last friday, thanks to JetBit and to my friend Massimo Bilancia, DotNetSide has organized the first Xamarin Dev Days in Potenza, Basilicata, Italy. What a great day! Meet people, make networking, share development experience in a wonderful location is always the best way to spend a day.
Here, some pictures of the day:
[ngg_images source=”galleries” container_ids=”1″ sortorder=”52,11,41,1,21,31″ display_type=”photocrati-nextgen_basic_slideshow” gallery_width=”600″ gallery_height=”400″ cycle_effect=”fade” cycle_interval=”5″ show_thumbnail_link=”0″ thumbnail_link_text=”[Show thumbnails]” order_by=”sortorder” order_direction=”ASC” returns=”included” maximum_entity_count=”500″]
Thanks to all the attendees!!!
Next stop: april 20 @ bari