10 Nov 2019
With this post it’s time to get into the first service build with gRPC. First of all, we’ll use the dotnet command to create our solution:

When finished, in Visual Studio Code the project will look like this:
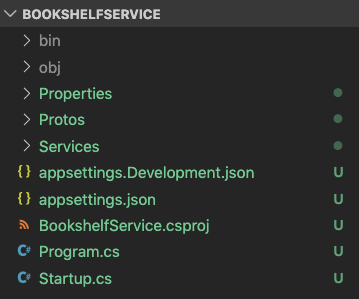
We need to check the project and take a look into these items:
- The
Services\*.cs files: contains the server-side implementation;
- The
Protos\*.proto files: contains the Protocol Buffer file descriptors;
- The
Startup.cs file: register the gRPC service by calling the MapGrpcService method;
Build our BookshelfService
Our first version of BookshelfService implements a simple method that allows saving a Book into our Bookshelf. To proceed, we need to change the default greet.proto by renaming to our brand new bookshelf.proto and changing its content with the following code:
syntax = "proto3";

option csharp_namespace = "BookshelfService";

package BookshelfService;

// The bookshelf service definition.
service BookService {
  // Save a Book
  rpc Save (NewBookRequest) returns (NewBookReply);
}

// The request message containing the book's title and description.
message NewBookRequest {
  string title = 1;
  string description = 2;
}

// The response message containing the book id.
message NewBookReply {
  string id = 1;
}
Now, we can open the GreeterService.cs and rename the class, and the file, into BookServiceImpl. Something like this:
namespace BookshelfService
{
    public class BookServiceImpl : BookService.BookServiceBase
    {
        private readonly ILogger<BookshelfServiceImpl> _logger;
        public BookshelfServiceImpl(ILogger<BookshelfServiceImpl> logger)
        {
            _logger = logger;
        }

        public override async Task<NewBookReply> Save(NewBookRequest request, ServerCallContext context)
        {
            // service implementation
        }
    }
}
Finally, be sure to change the MapGrpcService into your Startup.cs with this line:
endpoints.MapGrpcService<BookServiceImpl>();
Now, you’re ready to run your first gRPC service.
Wait, what happens? Let’s take a look under the hood
As previously said in this post the .proto file is responsible for the service definition. So, every time you change the .proto content, language-specific tools will generate the related objects. In our case, a set of C# classes. You can describe your service and the related messages by using a meta-language: the proto syntax.
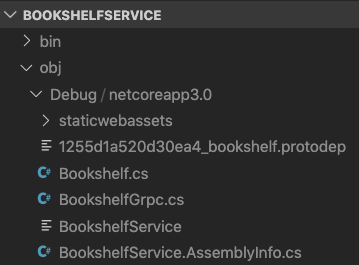
As you can see, we have defined two messages (NewBookRequest and NewBookReply) and a service (BookService). The Protocol Buffer tool will generate the messages as .NET types and the service as an abstract base class. You’ll find the generated source file in the obj folder.
Finally, to implements our service, we only need to extend the BookServiceBase class and overrides the defined methods. For example:
public override Task<NewBookReply> Save(NewBookRequest request, ServerCallContext context)
{
    var savedBook = BooksManager.SaveBook(request.Title, request.Description);
    return Task.FromResult(new NewBookReply
    {
        Id = savedBook.BookId
    });
}
Conclusion
This is a small example of a simple request/reply service integrated into an ASP.NET Core 3 application. You can test it by using BloomRPC or by creating a .NET client. We will see the second option in the next post.
Enjoy!
check full code on github
04 Nov 2019
One of the most critical issue in the developer work is the test phase. If you want to test a SOAP service, SoapUI is one of the most well known tools. If you want to test a REST service, you can build your requests by using Fiddler or Postman. But, if you want to test a gRPC service, what you can use?
Searching for a tool, I found BloomRPC. Inspired by Postman and developed with Electron and React, it’s free and open source, works on Windows, Linux and MacOS, and, in my opinion, is one of the most simpler tool for testing gRPC.
The usage is really simple:
- add you
.proto file to the project
- set the endpoint
- fill up your request with sample data
- press play button
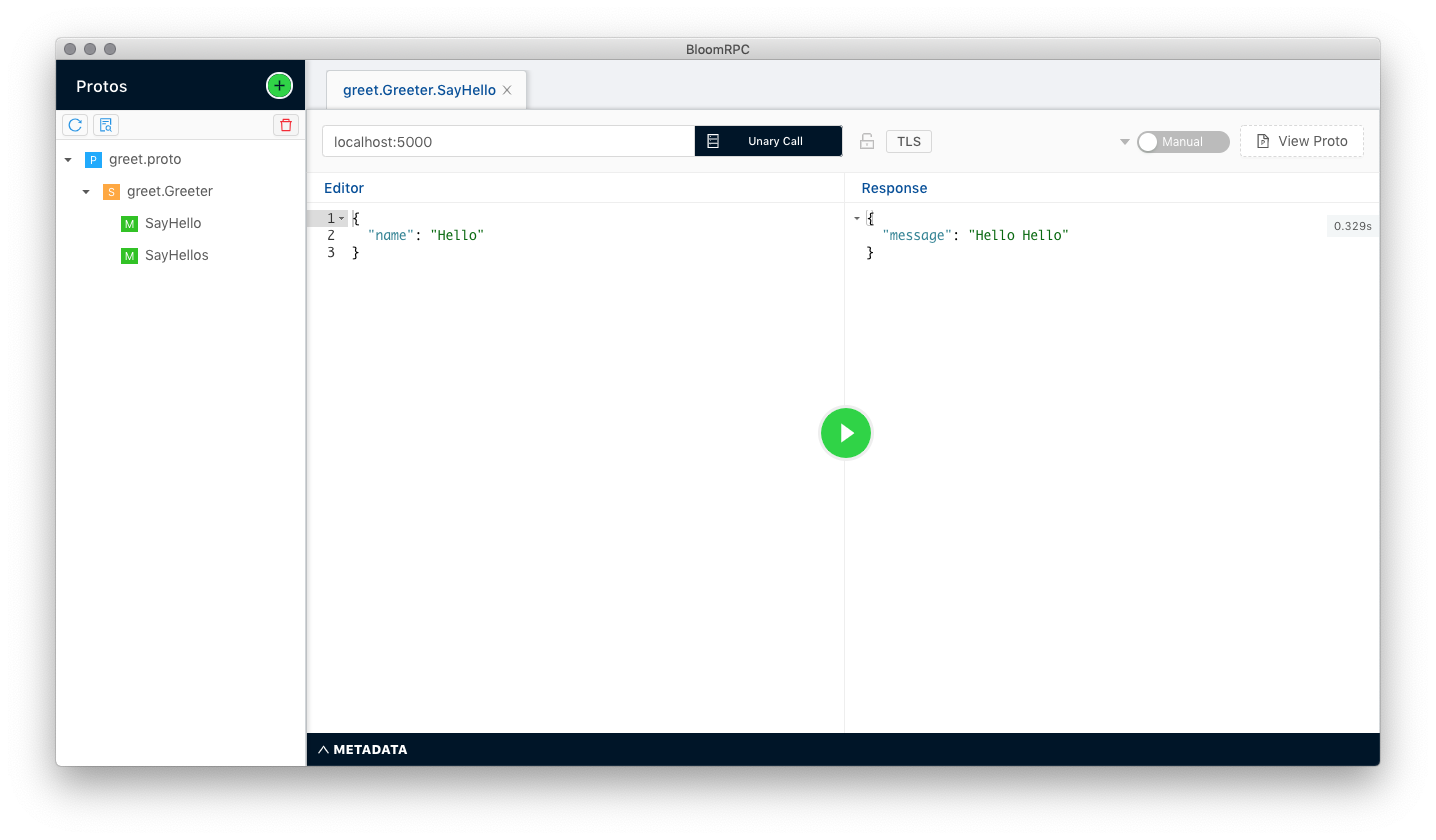
In this example I’m runing and testing the Greeter server example from gRPC-dotnet.
You can download and check BloomRPC from GitHub: https://github.com/uw-labs/bloomrpc
Enjoy!
Disclaimer: I’m not affiliated, associated, authorized, endorsed by, or in any way officially connected with the BloomRPC project.
07 Oct 2019
In this post we introduced gRPC and its .NET implementations. In some cases, you’ll need to use a gRPC client from a legacy Win32 process but, since the NuGet package of gRPC C# is based on the x64 C++ native library, it will not work as expected.
Luckly, a solution is really simple:
Before start to build, you need to build the C++ library. You can proceed in two ways:
- follow the steps on building page
- be sure that you have the x86 version of
grpc_csharp_ext.dll in cmake\build\x86\Release (or Debug) folder
To get the libraries, create a new project and add a nuget reference to Grpc package. Then go to packages\Grpc.Core.2.24.0\runtimes\win\native and copy the grpc_csharp_ext.x86.dll library in the previously mentioned cmake\build\x86\Release folder. Finally, be sure to rename the library in grpc_csharp_ext.dll. Now you’ll be able to build from Visual Studio 2019.
Enjoy!
28 Sep 2019
For those who still don’t know, gRPC is a RPC (Remote Procedure Call) framework with high performance in mind. Born in Google and used for years, it has been recently released to the open source world and now is supported in about 10 specific languages: from C# to Java, C++ or Go.
In this post we’ll made a really basic overview focusing on the basic concepts of gRPC and its main characteristics.
On my way to gRPC
RPC is not a new concept. We’ve started speaking about RPC in the late sixties but the first real implementation comes in the early 80s. It become very popular only in the nineties with Java Remote Method Invocation. In the following years we try to manage RPC in many ways: CORBA, .NET Remoting and WCF are just some example of this attempt.
But, why gRPC? Well, in the last few years, new scenarios comes - think about the increased number of connection from mobile device - and we need to adapt software architecture to responde to this new requirements: interoperability, openness, scalability, performance. gRPC was created with exactly these characteristics in mind and is based on two different technology: HTTP/2 and Protobuf.

HTTP/2 represents the evolution of the most famous HTTP/1.1 protocol, providing the best way to transport data by supporting binary and an optimized connection usage (single connection vs multiple connection). You can read the HTTP/2 RFC 7540 or get a short description here. The transmitted binary data, when using gRPC, is represented by the use of Protobuf.
Protobuf is a “Google’s mature open source mechanism for serializing structured data”. So, what does this mean? One of the big problem with REST is that you don’t have something like a WSDL doc that describes the service and helps you build a client, but you need documentation or samples before you can do it. With Protobuf you can write the service and data structure in a metalanguage and, later, you can use specific-language generator to build your own client and server side code.
Take this example:
message RequestMessage
{
  string FirstName = 1;
  string LastName = 2;
}

message ResponseMessage
{
  string FullName = 1;
}

service NameService
{
  rpc GetFullName (RequestMessage) returns (ResponseMessage) {}
}
You can build any supported language-specific code starting from this .proto file, so you can simply share that file with any client that needs to interact with your service. Wonderful!
gRPC in .NET
You can write services and clients in C# with gRPC by using two different libraries:
- gRPC C#: implementation based on Core native library https://www.nuget.org/packages/Grpc
- gRPC for .NET: managed implementation
The first one supports .NET Framework 4.5 and .NET Standard 1.5/2.0 while the second one supports .NET Standard 2.1 so you can use it only with .NET Core 3.0.
In the next posts we’ll explore the two implementations, checking the difference and how you can use it. In the meantime, on the official gRPC site, you can find guides and tutorials to start using the brand new microservice framework.
Enjoy!
24 Apr 2019
Some days ago, the ASP.NET team announce the official preview of Blazor, the Microsoft framework for building Single Page Application. Note that in the post, they declare that Server-Side Blazor will ship as part of .NET Core 3.0, announced for second half 2019, while Client-side Blazor will ship as part of a future .NET Core release.
Upgrade to Blazor preview
To upgrade your existing Blazor apps to the new Blazor preview first make sure you’ve installed the prerequisites listed above then follow these steps:
- Update all
Microsoft.AspNetCore.Blazor.* package references to 3.0.0-preview4-19216-03 by changing the PackageReference in csproj with this: <PackageReference Include="Microsoft.AspNetCore.Blazor" Version="3.0.0-preview4-19216-03" />
- Remove any package reference to
Microsoft.AspNetCore.Components.Server
- Remove any
DotNetCliToolReference to Microsoft.AspNetCore.Blazor.Cli and replace with a package reference to Microsoft.AspNetCore.Blazor.DevServer
- In client Blazor projects remove the
<RunCommand>dotnet</RunCommand> and <RunArguments>blazor serve</RunArguments> properties
- In client Blazor projects add the
<RazorLangVersion>3.0</RazorLangVersion> property
- Rename all
_ViewImports.cshtml files to _Imports.razor
- Rename all remaining
.cshtml files to .razor
- Rename
components.webassembly.js to blazor.webassembly.js
- Remove any use of the
Microsoft.AspNetCore.Components.Services namespace and replace with Microsoft.AspNetCore.Components as required.
- Update server projects to use endpoint routing:
Replace this:
app.UseMvc(routes =>
{
    routes.MapRoute(name: "default", template: "{controller}/{action}/{id?}");
});
With this:
app.UseRouting();

app.UseEndpoints(routes =>
{
    routes.MapDefaultControllerRoute();
});
Run dotnet clean on the solution to clear out old Razor declarations.
https://devblogs.microsoft.com/aspnet/blazor-now-in-official-preview/
Enjoy!
02 Mar 2019
Three years ago I wrote a blog post about my Xamarin.Forms component TLScrollView, a simple horizontal scrollview with bindable feature. The post was one of the most viewed and commented, and I’m really happy about that, but now, with the latest version of Xamarin.Forms, you can use the new BindableLayout feature.
Looking back, in my post you can see how to use the TLScrollView control:
<controls:TLScrollView Orientation="Horizontal" ItemsSource="{Binding Items}" HeightRequest="100">
    <controls:TLScrollView.ItemTemplate>
        <DataTemplate>
            <ViewCell>
                <StackLayout Padding="5">
                    <controls:TLImageCircle Source="{Binding Image}" HeightRequest="80" WidthRequest="80" />
                </StackLayout>
            </ViewCell>
        </DataTemplate>
    </controls:TLScrollView.ItemTemplate>
</controls:TLScrollView>
Change the code to support the BindableLayout is really simple. You don’t need to use my custom control since the BindableLayout is applicable to all Layout Xamarin.Forms controls. So, using the StackLayout, add the BindableLayout.ItemsSource attribute and the BindableLayout.ItemTemplate attribute to implement the binding. Here you can see the new code:
<StackLayout Orientation="Horizontal" BindableLayout.ItemsSource="{Binding Items}" HeightRequest="100">
    <BindableLayout.ItemTemplate>
        <DataTemplate>
            <ViewCell>
                <StackLayout Padding="5">
                    <controls:TLImageCircle Source="{Binding Image}" HeightRequest="80" WidthRequest="80" />
                </StackLayout>
            </ViewCell>
        </DataTemplate>
    </BindableLayout.ItemTemplate>
</StackLayout>
Check here how the BindableLayout works.
Enjoy!
28 Feb 2019
With Visual Studio 2019 Preview you can start to play with C# 8 and its great new features. While on Windows you only needs to install Visual Studio 2019 and .NET Core 3.0, on Mac you needs some additionally trick to make it works. In this post we’ll see how you can use C# 8 Preview with Visual Studio 2019 for Mac Preview.
Prepare your Mac
First of all, you need to download and install the following packages:
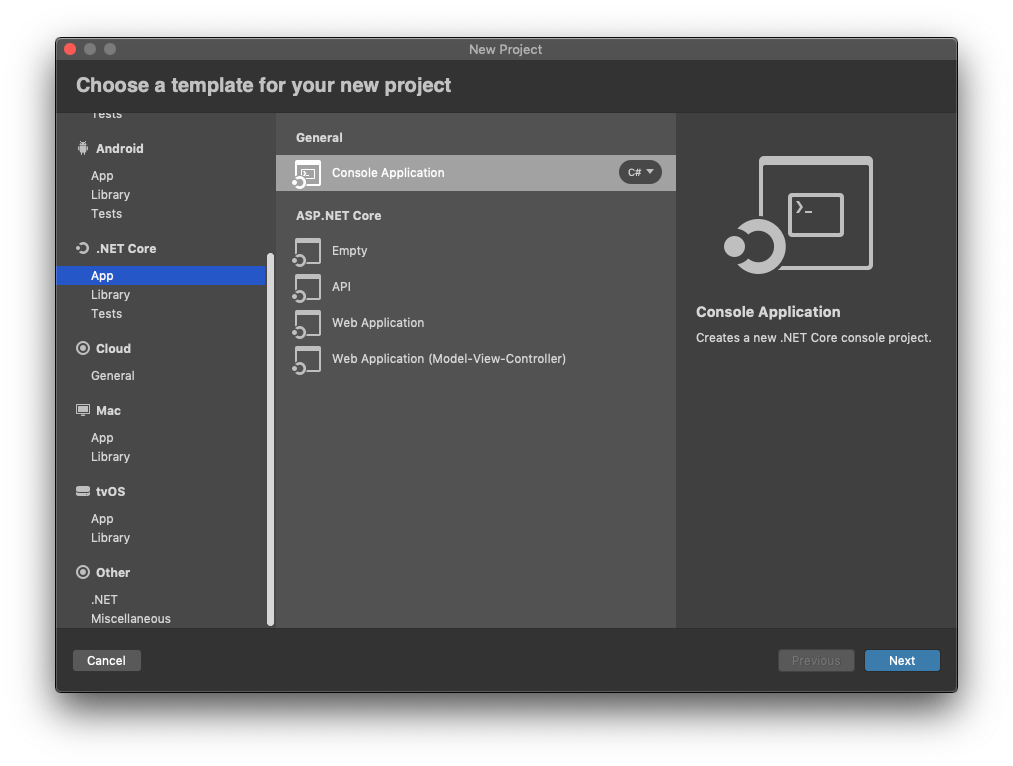
After installation is complete, start Visual Studio 2019 for Mac Preview and create a .NET Core Console Application:
Setting up your project
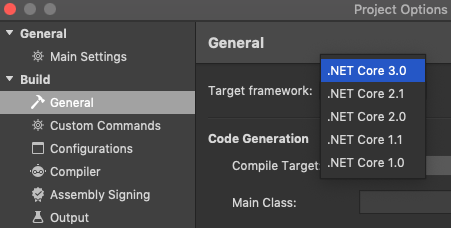
Now, click on projects Options > General and then set Target Framework to .NET Core 3.0:
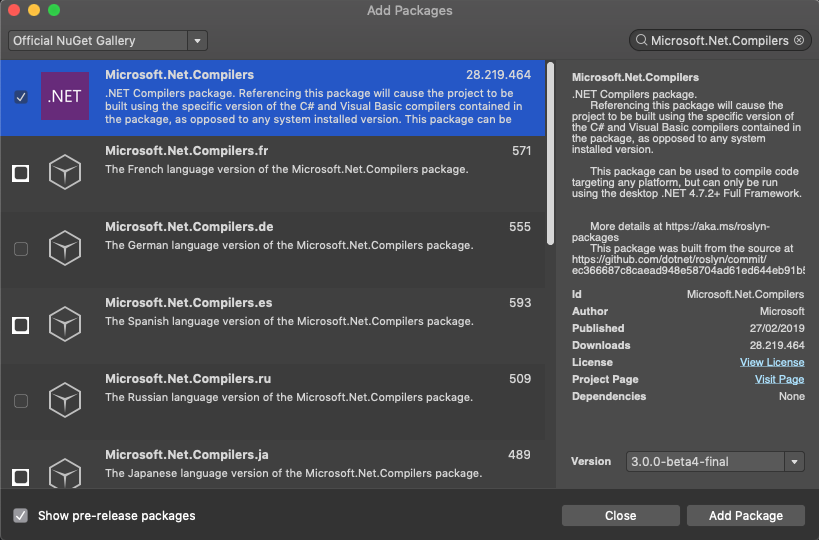
To successfully build the project, you need to add the Microsoft.Net.Compilers package, preview version, from NuGet:
Finally, edit the .csproj and add the following xml elements:
<PropertyGroup Condition=" '$(Configuration)|$(Platform)' == 'Debug|AnyCPU' ">
  <LangVersion>Preview</LangVersion>
</PropertyGroup>
<PropertyGroup Condition=" '$(Configuration)|$(Platform)' == 'Release|AnyCPU' ">
  <LangVersion>Preview</LangVersion>
</PropertyGroup>
You can check the full list of LangVersion here.
Start to play with C# 8
Ready to write you first C# 8 app? Go!
Check here what’s new in C# 8 and give it a try!
Note Most of the C# 8.0 language features will run on any version of .NET, but a few of them, like Async streams, indexers and ranges, all rely on new framework types that will be part of .NET Standard 2.1
UPDATE Visual Studio 2019 for Mac Preview 3
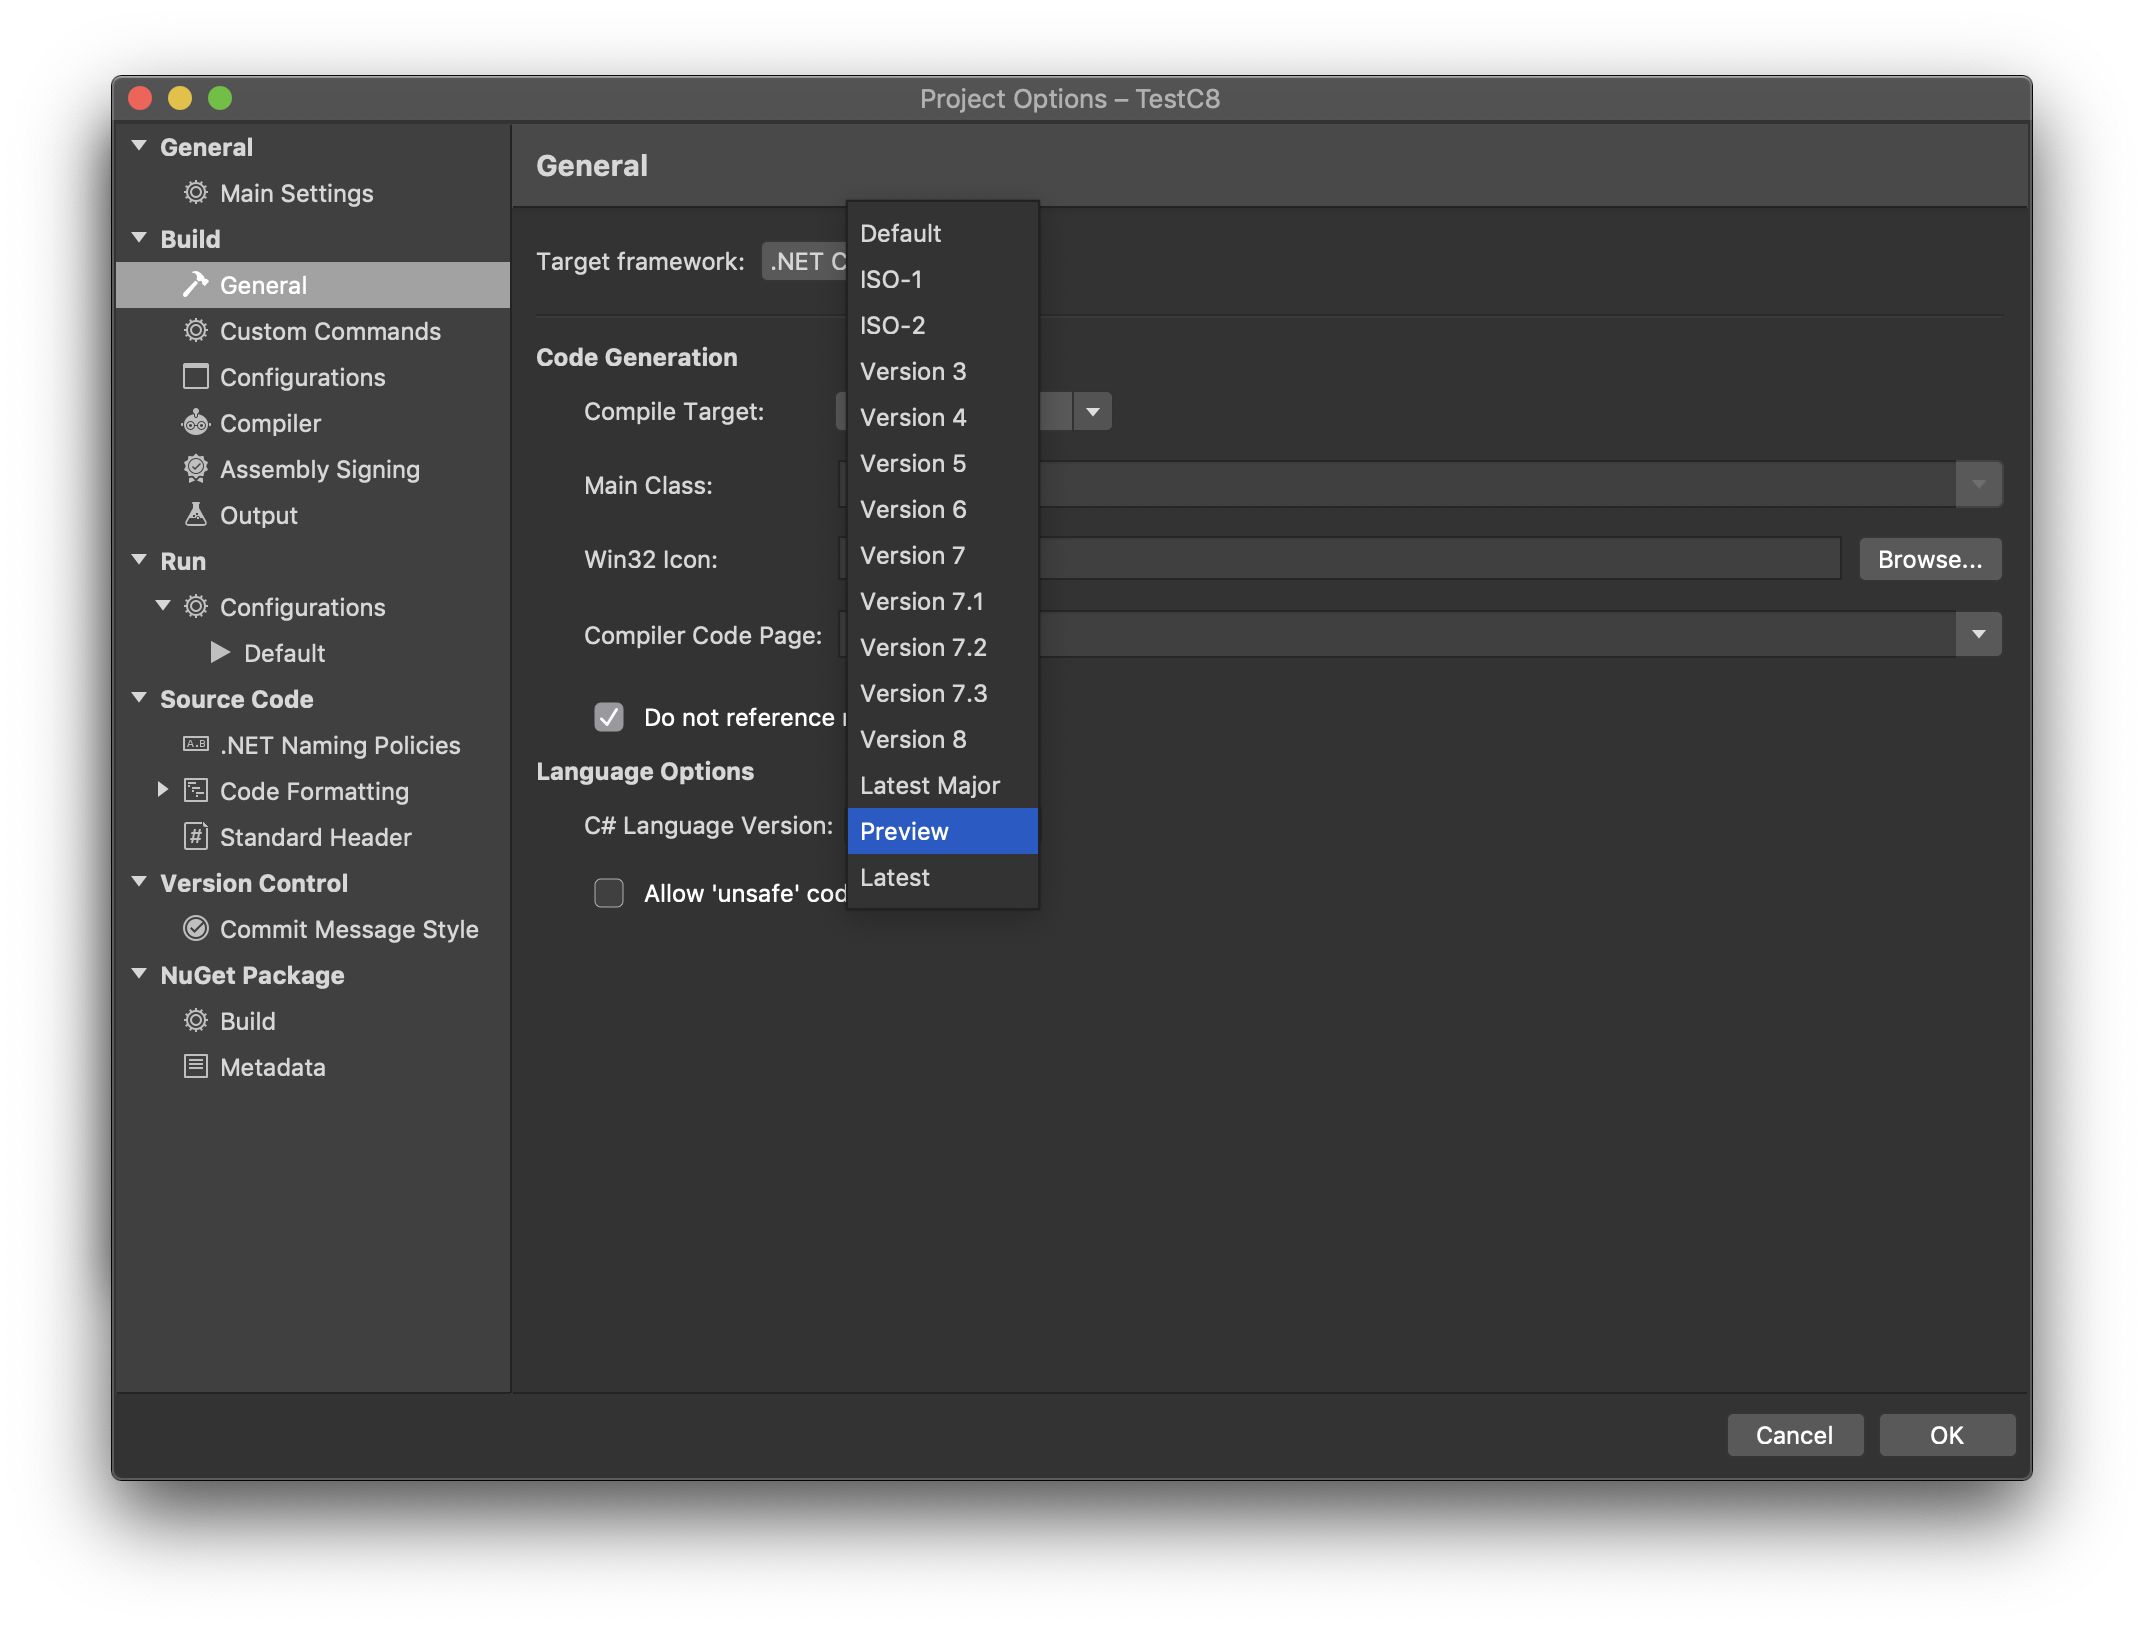
With the recently released Preview 3, you can set the C# language to Preview directly on project options:
Update it if you have already installed!
24 Feb 2019
As you can see in my last post, I’m moving my TitiusLabs.Core PCL to .NET Standard. After project migration, you can choose to maintain AssemblyInfo - and in my previous post you can see how to do it - or move to an auto generation model, as we’ll see in this post.
To auto generate the AssemblyInfo.cs, simply put the following PropertyGroup element in your .csproj:
<PropertyGroup>
  <Company>TitiusLabs</Company>
  <Authors>Fabio Cozzolino</Authors>
  <PackageId>TitiusLabs.Core</PackageId>
  <Version>1.0.0</Version>
  <AssemblyVersion>1.0.0.0</AssemblyVersion>
  <FileVersion>1.0.0.0</FileVersion>
</PropertyGroup>
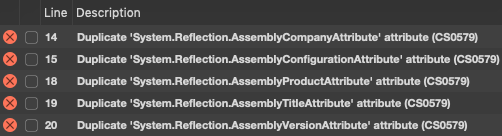
To avoid the Duplicate 'System.Reflection.AssemblyCompanyAttribute' attribute (CS0579) remove the AssemblyInfo.cs and set to true the GenerateAssemblyInfo in .csproj:
<PropertyGroup>
   <GenerateAssemblyInfo>true</GenerateAssemblyInfo>
</PropertyGroup>
And that’s all!
23 Feb 2019
Recently, I decided to upgrade my TitiusLabs.Xamarin library to the latest version of Xamarin.Forms and to .NET Standard 2.0. Here a small guide you need to follow if you want to upgrade your project from a very old version.
Update your project to .NET Standard 2.0
The first step in my path is the update of the TitiusLabs.Core project, a Portable Class Library (PCL) project, to a .NET Standard Library. To proceed, you need to be sure to have the right .NET Core version installed so, if not, go to the download page and install it!
Now, simply open the .csproj file and full replace it with the following xml:
<Project Sdk="Microsoft.NET.Sdk">
  <PropertyGroup>
    <TargetFramework>netstandard2.0</TargetFramework>
  </PropertyGroup>
  <ItemGroup>
    <Folder Include="Properties\" />
  </ItemGroup>
</Project>
Check your solution
Reopen your solution, or refresh it, and check if all projects correcly loads and reference your .NET Standard project. Most probably, you’ll get the following errors:
If you want to still use AssemblyInfo.cs, then add the following xml element into the .csproj:
<PropertyGroup>
   <GenerateAssemblyInfo>false</GenerateAssemblyInfo>
</PropertyGroup>
Now your code will work fine. To choose the correct version, be sure to check .NET Standard compatibility on this page.
That’s all!
07 Feb 2019
Azure Functions is a great way to build serverless applications in really few minutes. You can create a new API and host in Azure without worrying about server infrastructure. That sounds really good!
Just few steps
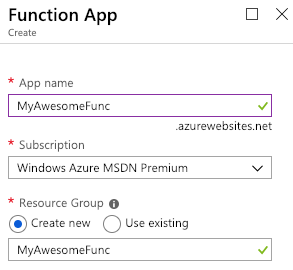
To build your Azure Functions, you can just follow these steps:
- Go to the Azure Portal and login by using your credentials or create a new account
- Click on
New Resources and then write Function App

- Select the
Function App item and then click on Create button

- Now set your function name
- Finally you’ll find the new Azure Function in the relative section

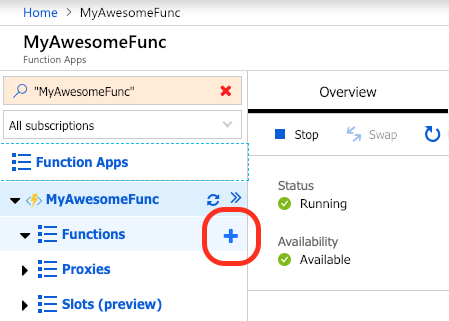
Now it’s time to write code
In Azure Function App, you can click in + button to create a new HTTP function:
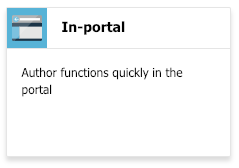
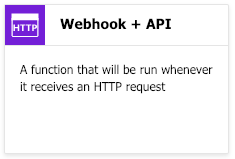
select the in-portal mode and then WebHook + API to quickly create a function online:
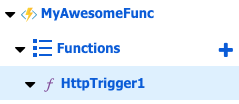
Now click on HttpTrigger1 on left panel:
On the right panel, you’ll see the startup code on file run.csx
#r "Newtonsoft.Json"

using System.Net;
using Microsoft.AspNetCore.Mvc;
using Microsoft.Extensions.Primitives;
using Newtonsoft.Json;

public static async Task<IActionResult> Run(HttpRequest req, ILogger log)
{
    log.LogInformation("C# HTTP trigger function processed a request.");

    string name = req.Query["name"];

    string requestBody = await new StreamReader(req.Body).ReadToEndAsync();
    dynamic data = JsonConvert.DeserializeObject(requestBody);
    name = name ?? data?.name;

    return name != null
        ? (ActionResult)new OkObjectResult($"Hello, {name}")
        : new BadRequestObjectResult("Please pass a name on the query string or in the request body");
}
You can adapt and change the above code as you like to meet your needs.
Run, run your code
Finally, it’s time to press on RUN button and see the result in the right panel:
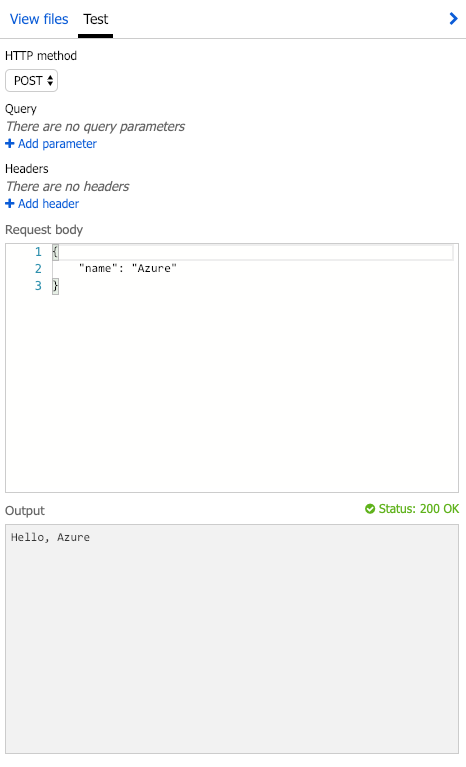
And that’s all! You can write Azure Function triggered by HTTP requests by using the online portal editor.
Wait … and Blazor?
As said, Azure Functions give you the ability to create a serverless application architecture. This means that you can call your function from anywhere. Since it is exposed via REST API, you can call it in a Blazor app, and it is really simple. The HttpClient is registered by default in the Blazor IoC, so you can simply write @inject HttpClient http after the @page directive and then use it in your code:
@page "/"
@inject HttpClient http

<!-- My HTML Code -->

@functions
{
    protected override async Task OnParametersSetAsync()
    {
        var url = "https://myawesomefunc.azurewebsites.net/api/HttpTrigger1?code=hIxLyOrcHlliT...W8aGprWLNLQ==";
        var awesomeResponse = await http.GetJsonAsync<string>(url);
    }
}
Enjoy!